

![]() To upload an image from your own device, click on the Choose File button and then locate that file using your devices file viewer and click the Open button. It will bring you back to the Banner image screen and show that image file name displaying to the right of the Choose File button (ex. tennis-bg.png).
To upload an image from your own device, click on the Choose File button and then locate that file using your devices file viewer and click the Open button. It will bring you back to the Banner image screen and show that image file name displaying to the right of the Choose File button (ex. tennis-bg.png).
![]() Next choose the upcoming Webinar or Meeting you want to assign this image to from the dropdown to the right of the Choose File button
Next choose the upcoming Webinar or Meeting you want to assign this image to from the dropdown to the right of the Choose File button
![]() Then click the Submit button to save the change.
Then click the Submit button to save the change.
This will add that image to that webinar or meeting (which you can view by clicking on the Webinars tab and then editing that Webinar event). It will also appear as the first image in the Your Existing Image Library area below.
Note: You can also add an image from your own device directly from each Event’s Edit Screen.
Any custom image you upload from your own device(s) or add from the Pixabay Search is added to Your Existing Image Library.
![]() You can use the Search Box to quickly find any image in your library.
You can use the Search Box to quickly find any image in your library.
![]() Click the Go button to execute the search
Click the Go button to execute the search
![]() For any image, you can Delete (removes it from your library forever) or Edit it.
For any image, you can Delete (removes it from your library forever) or Edit it.

Once you click to Edit an image button, you have the ability to:
![]() Check the boxes to assign that image to any upcoming Webinar or Meeting.
Check the boxes to assign that image to any upcoming Webinar or Meeting.![]() Add an Alt Tag (Alternative description of the image, should be done in sentence format and are important for SEO and ADA compliance).
Add an Alt Tag (Alternative description of the image, should be done in sentence format and are important for SEO and ADA compliance).
![]() Once you are done making your changes, click the Save button and this will update the image to any Webinars or Meetings you assigned it to.
Once you are done making your changes, click the Save button and this will update the image to any Webinars or Meetings you assigned it to.
Pixabay is a great site that provides a library of close to 2 million copyright safe and royalty free images that are sources from the Creative Commons. To access this incredible resource:
![]() Click on the Search for an Image on Pixabay tab
Click on the Search for an Image on Pixabay tab
![]() Type any topic you desire into the Search bar
Type any topic you desire into the Search bar
![]() Click the Go button to browse through a selection of images to choose from.
Click the Go button to browse through a selection of images to choose from.
![]() Once you find an image you like, select an upcoming webinar (or meeting) from the dropdown to assign it
Once you find an image you like, select an upcoming webinar (or meeting) from the dropdown to assign it
![]() Click the Save button to complete the change.
Click the Save button to complete the change.
This will add this image to that Webinar or Meeting’s event page and it will become the first image in the Your Existing Image Library tab.

To add or utilize images in your Existing Image Library, click on the Webinar – Backgrounds or Meeting – Backgrounds tabs.
Note: The process of adding Background images is identical to that of how to Add Banner Images, which you can view here.
Upload a Custom Image
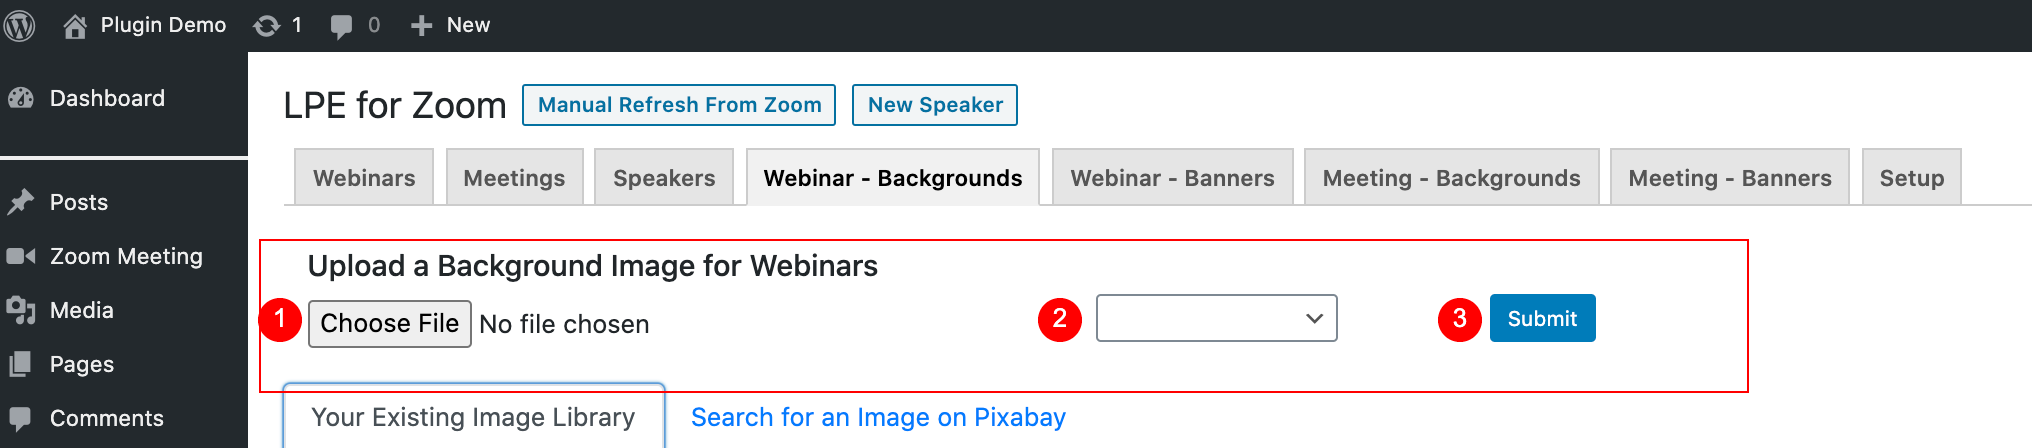
![]() To upload an image from your own device, click on the Choose File button and then locate that file using your devices file viewer and click the Open button. It will bring you back to the Background image screen and show that image file name displaying to the right of the Choose File button (ex. tennis-bg.png).
To upload an image from your own device, click on the Choose File button and then locate that file using your devices file viewer and click the Open button. It will bring you back to the Background image screen and show that image file name displaying to the right of the Choose File button (ex. tennis-bg.png).
![]() Next choose the upcoming Webinar or Meeting you want to assign this image to from the dropdown to the right of the Choose File button
Next choose the upcoming Webinar or Meeting you want to assign this image to from the dropdown to the right of the Choose File button
![]() Then click the Submit button to save the change.
Then click the Submit button to save the change.
This will add that image to that webinar or meeting (which you can view by clicking on the Webinars tab and then editing that Webinar event). It will also appear as the first image in the Your Existing Image Library area below.
Note: You can also add an image from your own device directly from each Event’s Edit Screen.
Your Existing Image Library
Any custom image you upload from your own device(s) or add from the Pixabay Search is added to Your Existing Image Library.
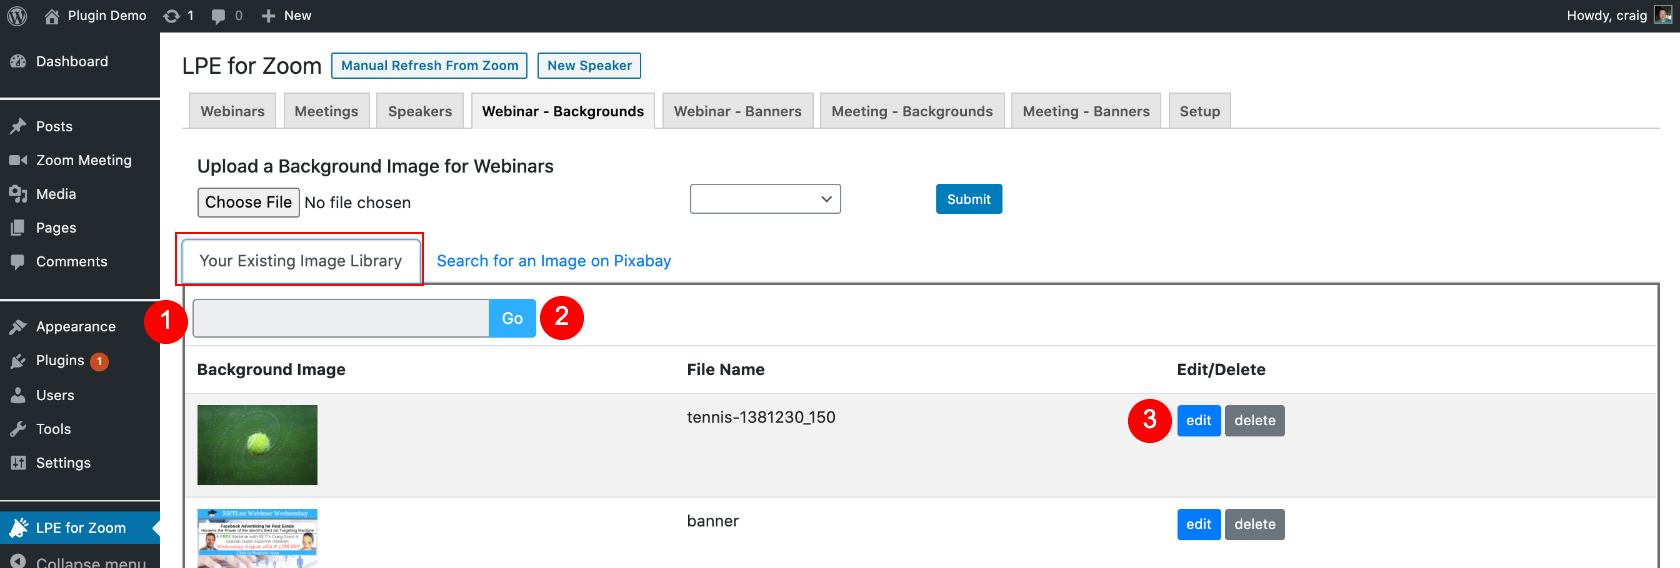
![]() You can use the Search Box to quickly find any image in your library.
You can use the Search Box to quickly find any image in your library.
![]() Click the Go button to execute the search
Click the Go button to execute the search
![]() For any image, you can Delete (removes it from your library forever) or Edit it.
For any image, you can Delete (removes it from your library forever) or Edit it.
Edit an Image Screen
Once you click to Edit an image button, you have the ability to:
![]() Check the boxes to assign that image to any upcoming Webinar or Meeting.
Check the boxes to assign that image to any upcoming Webinar or Meeting.
![]() Add an Alt Tag (Alternative description of the image, should be done in sentence format and are important for SEO and ADA compliance).
Add an Alt Tag (Alternative description of the image, should be done in sentence format and are important for SEO and ADA compliance).
![]() Once you are done making your changes, click the Save button and this will update the image to any Webinar or Meetings you assigned it to.
Once you are done making your changes, click the Save button and this will update the image to any Webinar or Meetings you assigned it to.
Search for an Image on Pixabay Tab
Pixabay is a great site that provides a library of close to 2 million copyright safe and royalty free images that are sources from the Creative Commons. To access this incredible resource:
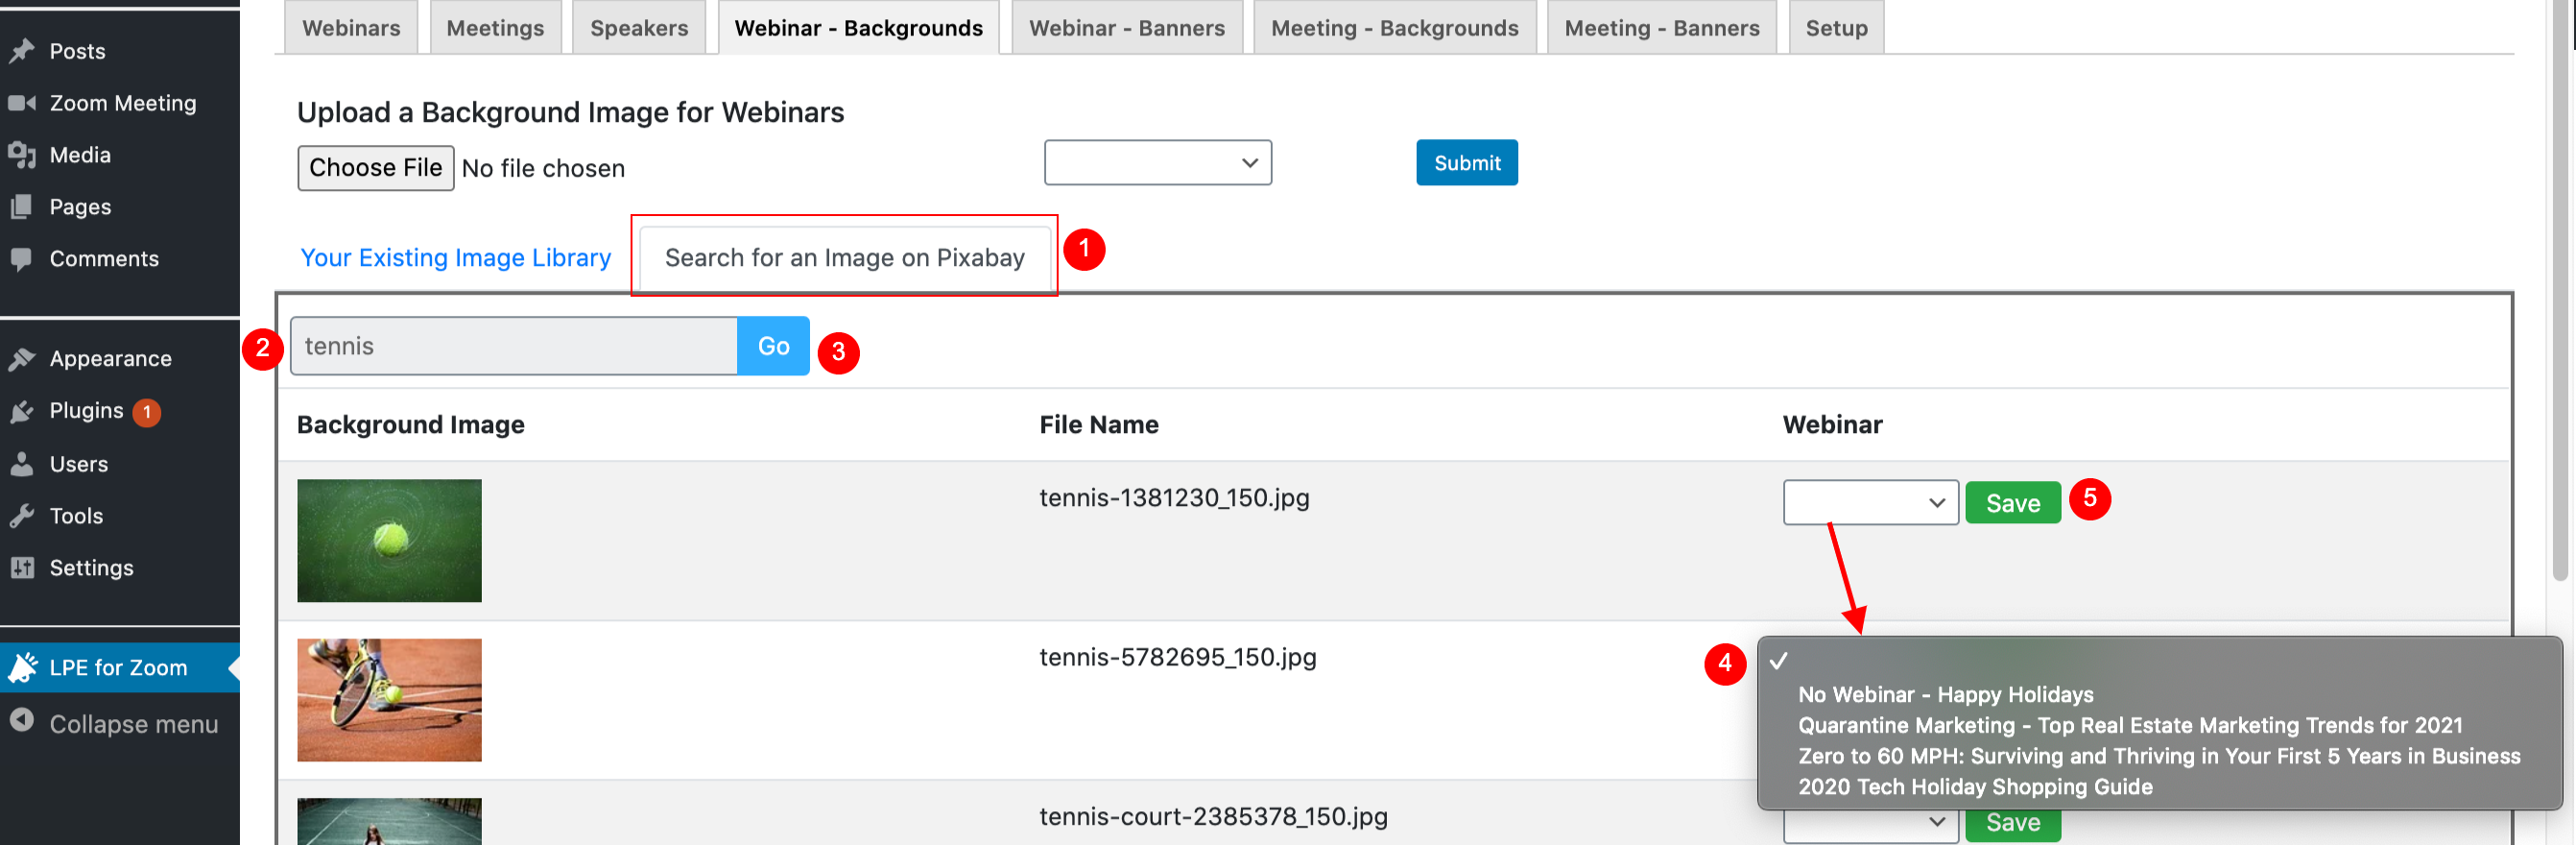
![]() Click on the Search for an Image on Pixabay tab
Click on the Search for an Image on Pixabay tab
![]() Type any topic you desire into the Search bar
Type any topic you desire into the Search bar
![]() Click the Go button to browse through a selection of images to choose from.
Click the Go button to browse through a selection of images to choose from.
![]() Once you find an image you like, select an upcoming Webinar (or Meeting) from the dropdown to assign it
Once you find an image you like, select an upcoming Webinar (or Meeting) from the dropdown to assign it
![]() Click the Save button to complete the change.
Click the Save button to complete the change.
This will add this image to that Webinar or Meeting’s event page and it will become the first image in the Your Existing Image Library tab.
]]>